
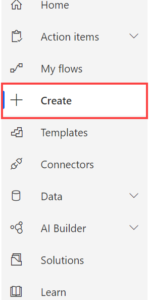
Begin by navigating to Power Automate in your Office Portal and selecting the “Create” button on the sidebar.
From here, you can choose from a list of pre-made flow templates, or you can start from scratch by choosing “Automated Flow”, “Instant Flow”, and “Scheduled Flow.”

-
- Automated Flows will run when an event or action triggers the flow to run. For example, when a file is modified, or a status is changed on a SharePoint list.
-
- Instant Flows will run when manually triggered. For example, when a “Flow” button is pressed within a mobile app.
-
- Schedule Flows only trigger when a scheduled time arrives. For example, if you want an expense report to be generated every Monday morning.
To create an automatic notification when a file is modified in SharePoint, we will be using an Automated Flow.
From here, select “Skip” to move to the next step.
Step 2: Choose the Flow Connector and Trigger
There are many connectors and triggers that you can choose from to get your flow started. Connectors represent the app and service that you want to connect to. For example, Microsoft Planner, LinkedIn SharePoint, etc. Each connector has different triggers available. A “trigger” is the action that occurs to initiate the flow. This can be a status change in Planner, a post being shared on LinkedIn, etc. In this example, we will be choosing the SharePoint trigger “When an item or a file is modified.”

Map the action to the desired “Site Address”, “List or Library Name”, and “Folder.” Then select “New Step.”

Step 3: Choose the Flow Action
Next, you must determine what action will occur when the designated trigger occurs. In this example, we will choose the Microsoft Teams action “Post a message.”

Next, fill out the details of the chosen action. In this example, you will select the Team and Channel that you wish to send the notification to and will create the notification message. Make sure to use ‘dynamic content’ to make your notification as specific as possible. Then click “Save.”


Try these additional dynamic content tags:
-
- Use the dynamic content “Modified” to display when the change occurred.
-
- Create the custom expression “workflow()” to display the name of the corresponding flow.
-
- Use the dynamic content “Full Path” to show the exact path to the modified file.
Step 4: Test Your Flow
Now that you have set up your flow, it is time to test that it works. Begin by going to the designated SharePoint library and selecting a test file. Make a change to that file. It can be as simple as adding a single character to a text document. Make sure the file indicates that the changes have been ‘saved.’

Return to your flow’s dashboard and check the run history. If your flow ran successfully, you will see a timestamp with a “success” indicator.

If the flow has not run yet, give it a few moments, and then refresh. If the flow still has not run, double check all the information that you input and try again.
Finally, verify that the notification successfully sent to the designated Microsoft Teams channel.

Congratulations!
You have successfully set up an automated Microsoft Teams notification using Power Automate flows.
This type of automation is just one example of how your Microsoft 365 environment can work smarter for you. Microsoft Copilot takes this even further by connecting your data, communication, and workflows across the platform, enabling you to ask questions, take action, and automate tasks in natural language.
Looking to explore what Copilot can do for your team? Book a Copilot Readiness Consultation with Apex Digital Solutions to see if it’s the right fit for your organization.